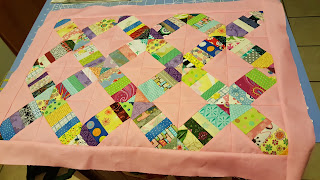
I'm happy to say I completed 5 blocks in less than an hour last night. The construction is pretty mindless once all the background squares are marked and ready to go, and while I'm not always into mindless sewing, it's pretty therapeutic after a long day at work.
Here are the instructions for how I added the strings to the background squares:
Lay the first strip against one of the drawn lines, right sides together. Note the white line is not the stitching line, it's just a guide for placement of the strip. The stitching will be 1/4" from that edge. Remember the 3-1/4" measurement? The reason I added the quarter inch was to accommodate the seam allowance. The sewn strip will actually be 3" from the corner. I pinned the strip down so it wouldn't shift under the presser foot.
One thing to remember: don't skimp on the pressing. The strips need to be very flat before the next one is added.
Do the same thing on the other drawn line:
Right sides together, and placed just inside the white line. Then add the next strip to the outside of the previous one:
I drew a pink line of the last picture to show which edge to stitch. After stitching, open the strip out, and press it. Keep adding strips until the black on the sides is completely covered.
At this point, I didn't try to trim them to the correct size, but I did some rough trimming (about 1/4" outside the black square) just to reduce the bulk.
I'm really pleased with the way they are turning out and can't wait to get some more done!
Stay tuned for more progress. By the way, it you try this tutorial, leave me a comment and let me know how it worked out for you. Feedback is good! I'd love to see pictures of your blocks and will post them here if you want to email them to me.


